Adding a button to your website navigation menu is now a common trend to prominently display a call-to-action, contact now, booking, login, get started, and other important links. Since most website visitors encounter the header area first, displaying a button here can easily guide them to the most important pages.
You might be looking for a code-free way to add and style a button to your WordPress website navigation menu. In this write-up, we are going to show you how to add a button to the WordPress menu.
We’ll explore the two simplest methods for adding a button to your header navigation menu, covering the process of inserting a button into both block-based and classic themes to ensure a solution for all WordPress users.
Table of Contents
Why You Should Add a Button in WordPress Header Menu
We’re all aware of adding a button to WordPress pages or posts. Similarly, showing a button in the WordPress header menu can also effectively draw visitors’ attention and guide them toward critical web pages or external links.
Here are a few benefits of having a button on the WordPress header menu.
👉 Modern and Intuitive Design: End of the days of customizing WordPress menu with simple text links. Nowadays, designers are styling the header area with versatile elements like icons, buttons, contact no, etc.
👉 Better Visibility: Grab your visitor’s attention instantly with a button rather than displaying simple text links. And, easily drive them to your targeted pages.
👉 Enhanced User Engagement: Visitors tend to click on a button more than other design elements. Further, designing an interactive button with customization options like icons and hover effects can greatly increase user engagement.
👉 Improved Click-through Rate (CTR): Another beneficial part of adding a button to the WordPress menu is improved click-through rate. Buttons are more actionable and noticeable.
👉 Higher Conversion Rates: Adding a button to the website menu can directly impact higher conversion rates. It makes your work easy to link crucial pages like Create an Account, Purchase Products, Services, Offers, etc.
Method 1: How to Add a Button in WordPress Block Editor Theme Menu
Let’s learn how to add a button in the WordPress menu from a block editor theme. You will be able to create a complete and interactive header navigation for your website.
🔶 Prerequisites
If you’re following this method, you must have the GutenKit free and pro version installed on your WordPress website.
Then, from your WordPress website, head to GutenKit > Blocks. Then, turn on the following blocks if these aren’t enabled by default:
- GutenKit Container Block
- GutenKit Advanced Image Block
- GutenKit Nav Menu Block
- GutenKit Button Block
#️⃣ Step 1: Customize Header Template
GutenKit is compatible with FSE (Full Side Editor) and you can edit the header area within the block editor dashboard.
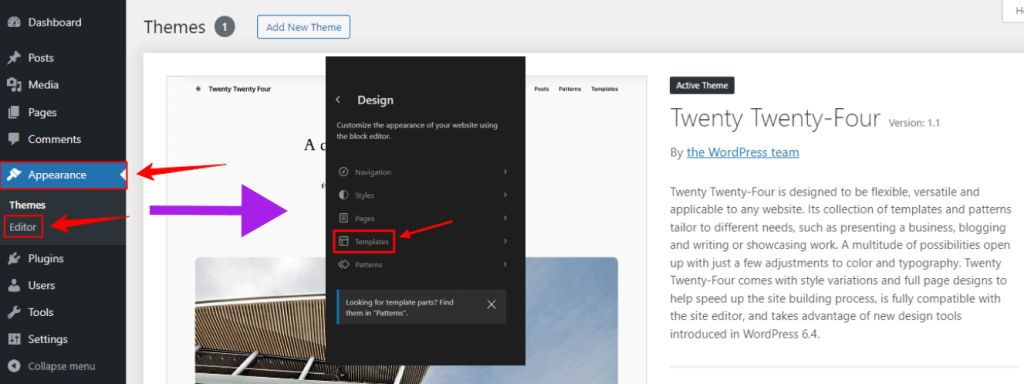
To do this, from your WordPress dashboard, follow Appearance > Editor and select Templates.
Then, navigate to Blog Home > Header.
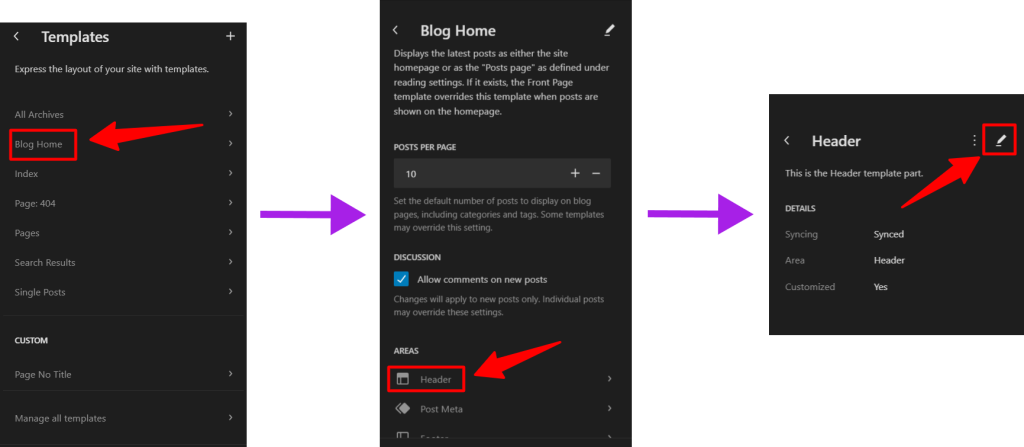
Now, click the Edit icon to customize the header template. You’ll be seeing the existing menu of your website. Now, we’ll be customizing the header area.
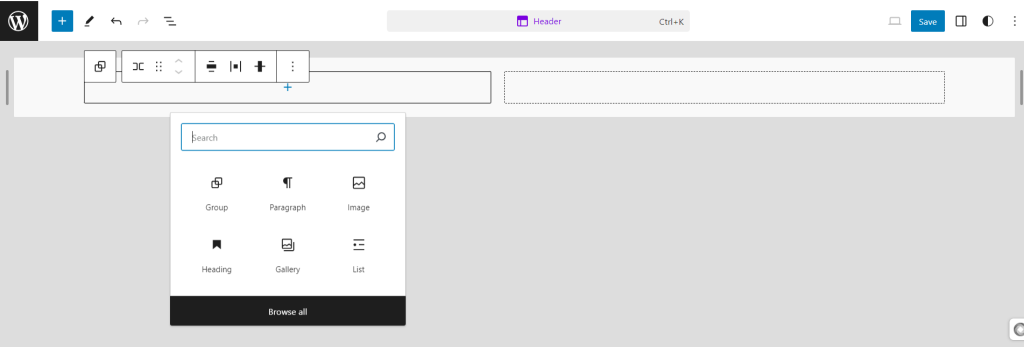
#️⃣ Step 2: Add GutenKit Containers

Start by taking the GutenKit Container block and make the following changes in the Layout Tab:
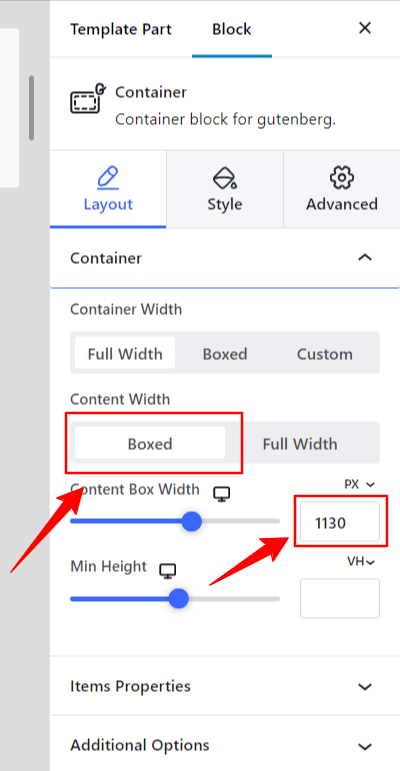
Under Container Option:
- Content Width: Box
- Content Box Width: 1130 px
Under Item Properties:
- Justify Content: Space Between
This container block will work like a parent container area. Because, within this Container block, we’ll add two other Container blocks. There will be the GutenKit Advanced Image block in the first container block and the second one will accommodate the GutenKit Nav Menu block and GutenKit Button block.
So, insert the first Container block and set the below changes:
From the Layout tab go to under the Container option:
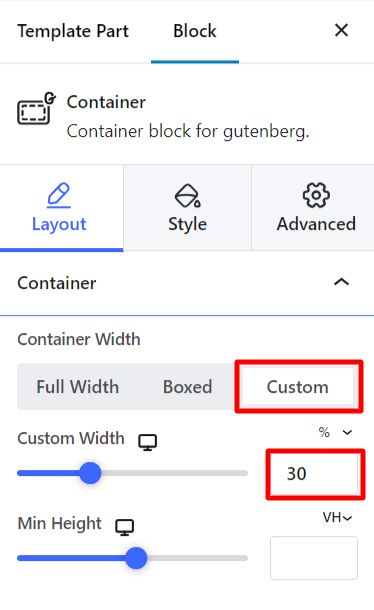
- Container Width: Custom
- Custom Width: 30%
Up next, we’ll add another Container block. And, you’ll make a couple of changes to the Layout tab.
- Container Width: Custom
- Custom Width: 70%
#️⃣ Step 3: Upload Logo Image
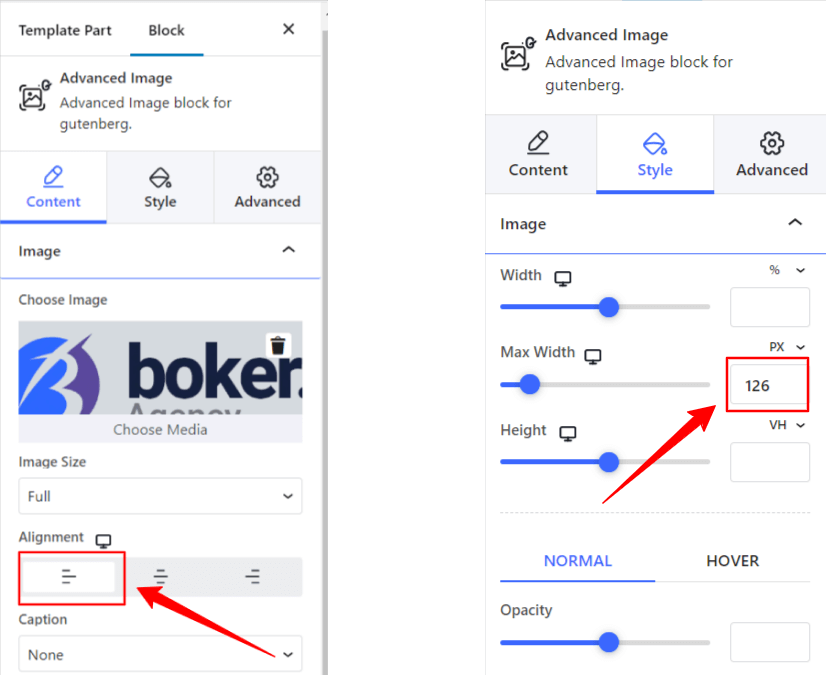
Now, you need to add the GutenKit Advanced Image block to this container. Here, upload an image from the Content tab and align the image to the left (Alignment: Left). Next, move to the Style tab and set the Image Max Width to 126 px.
#️⃣ Step 4: Set Website Menu
Now, come to the second container. We’re adding the GutenKit Nav Menu block first. As you will assert this block, it will show the published pages as menu items. Using this block to add and style your WordPress website navigation is easy.

To add a custom or new menu item, click the (+)icon at the right of the last menu item. For our menu, you can see different items like Home, About, News, Portfolio, Contact, etc. It depends on your website’s demand.
Now, go to the Content tab of the Nav Menu block settings and do this single change:
- Justify Content: End
Here, you don’t have to touch anything more in this block’s setting for our design. But, using the customizing features of the GutenKit Nav Menu, you can easily bring the look and feel to your navigation menu.
#️⃣ Step 5: Add Button to Menu
At this point, we’ll focus on adding the button to our WordPress menu. You just need to insert the GutenKit Button block into the second container.
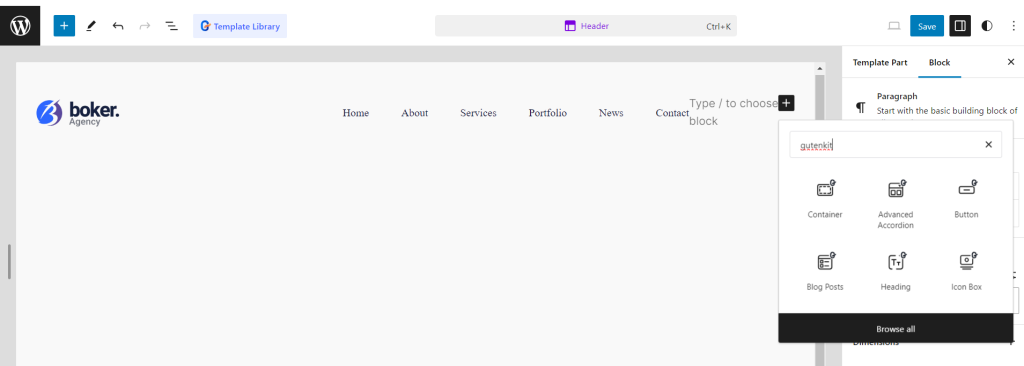
The button block loads with an icon and text. You can change them using the settings below:
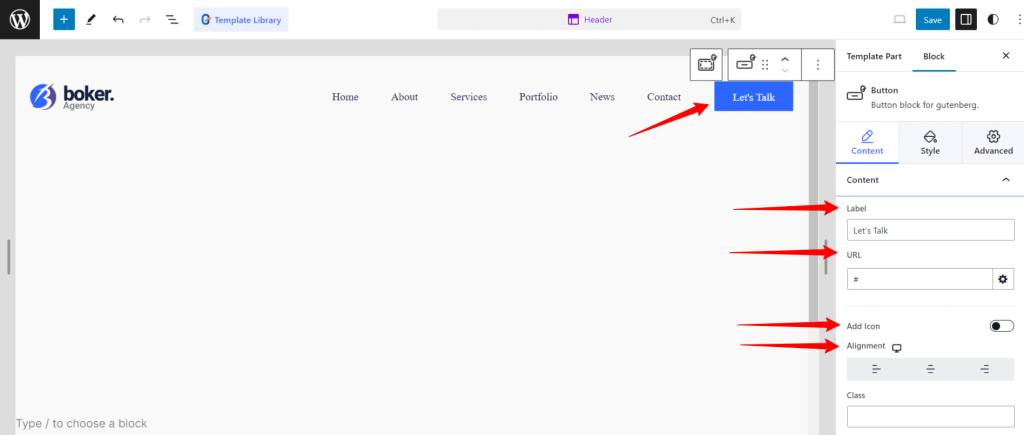
Under the Content tab,
- Label: Add your button text. For us, it is: Let’s Talk.
- Add Icon: Disable this toggle button to not show any icon with the button.
Under the Style tab,
- Padding: Top 11, Right: 27, Bottom: 9, Left 27.
You can add your own text and icon on the button. And, also customize its position by using the padding, alignment, and other features of this block settings.
Note that this button isn’t visible from mobile devices by default. To show a button from the mobile menu, go to the Advanced tab of the GutenKit button block.
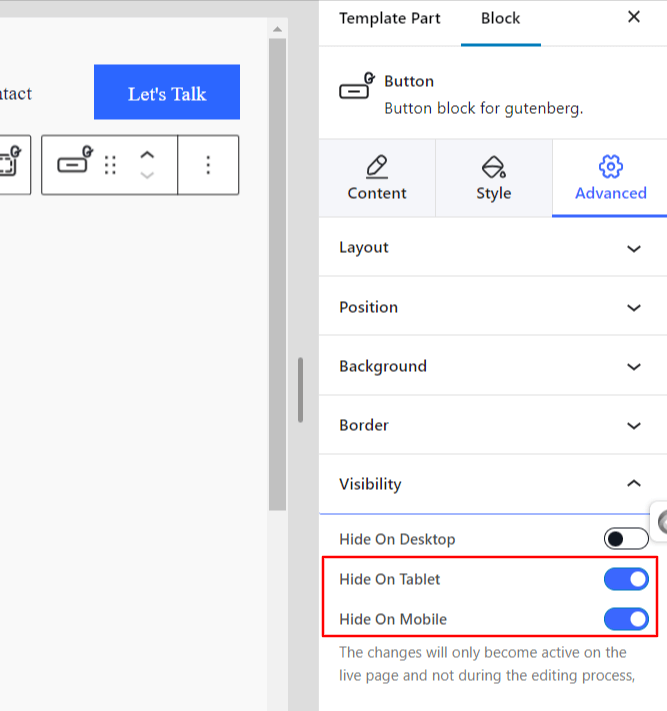
Under the Visibility option, disable the toggle button next to tablet and mobile. All done, hit the Save button. That’s it you have successfully added a button to your website menu.
🟢 Desktop View:
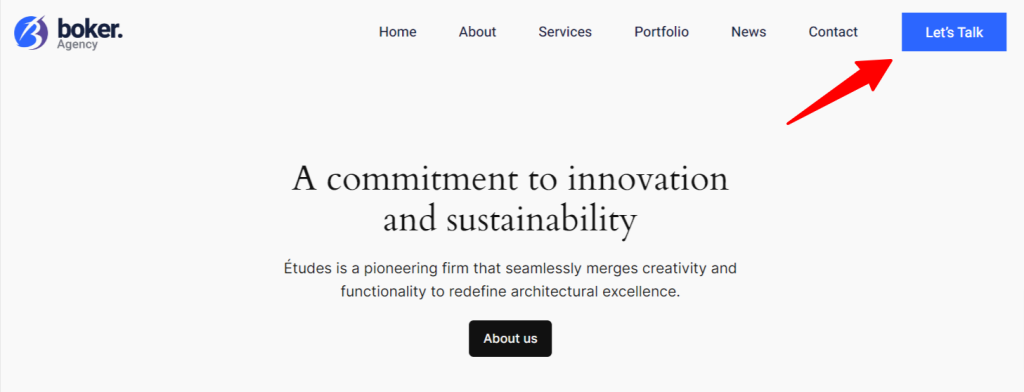
🟢 Mobile View

Method 2: How to Add a Button in WordPress Classic Theme Menu
If you prefer using the classic WordPress theme, installing a conventional page builder plugin like Elementor is the easiest way to add a button to your website menu.
Further, to get some additional advanced customization features, we’re also taking the help of an Elementor addon.
🔶 Prerequisites
Throughout this tutorial, we’re using the following widgets:
- ElementsKit Image Widget
- ElementsKit Nav Menu Widget
- ElementsKit Button Widget
Make sure, you have activated them all through navigating to ElementsKit > Widgets from your WordPress dashboard.
#️⃣ Step 1: Set Website Menu
The first thing you need to do is configure your existing menu settings or create a new menu.
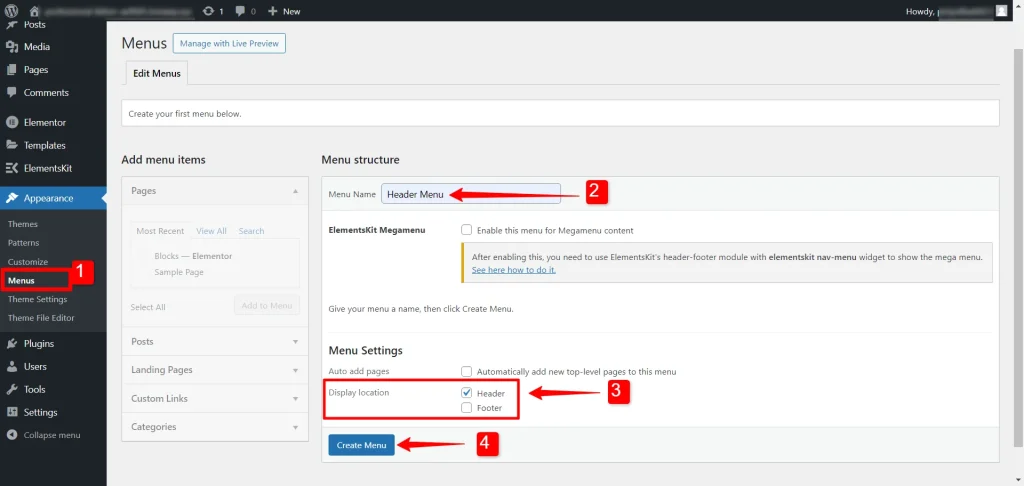
From your WordPress dashboard, head to Appearance > Menus. On the next page, modify your menu if needed or click on “create a new menu” to build a new menu for your website.
Enter your Menu Name and set the Display Location to Header. Then, hit the “Create Menu” button.
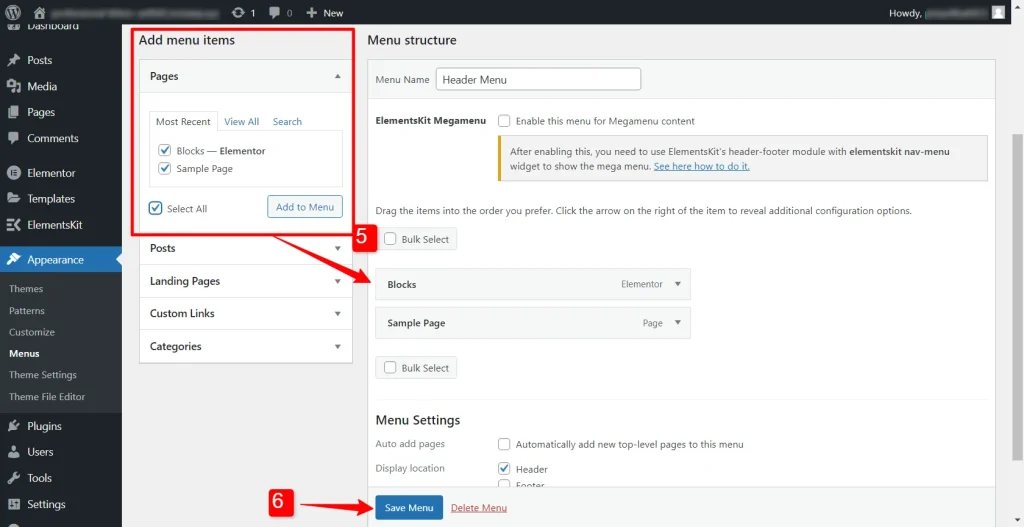
Then, drag and drop pages, posts, custom links, or categories you want to add as your menu items. Once done, hit the Save Menu button. Now, you’ve successfully added your WordPress menu.
#️⃣ Step 2: Add Elementor Section
Now, from your Elementor editor, insert a new section with two columns. First, enter the section settings and go to the Style tab. Here, add a background color.
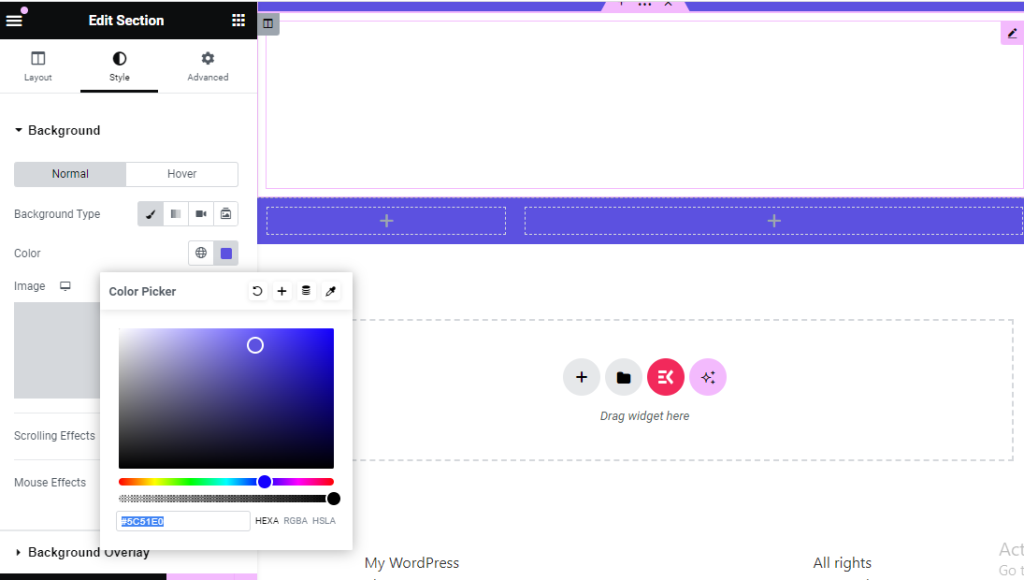
- Background Color: #5C51E0
This section will be the header layout of your website. You can add different customization to it. For example, you can also apply an image or gradient background in the section’s background.
Next, go to the Layout tab and you’ll find various controls for styling and adjusting layouts placment.
If you’re following our tutorial, edit the first column and make the below changes from the Layout tab.
- Column Width: 25
- Widget Spaces: 0
For the second column, do the following customization within the Layout tab:
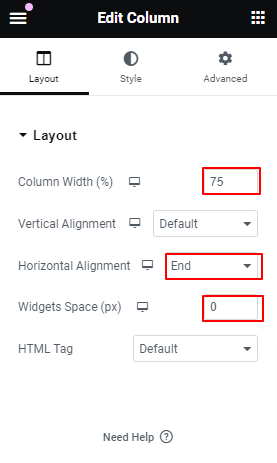
- Column Width: 75
- Horizontal Alignment: End
- Widget Spaces: 0
#️⃣ Step 3: Upload Logo Image
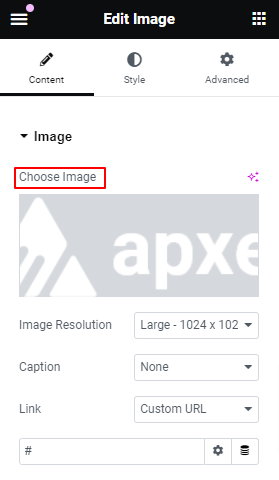
In the first column, we’ll add the Image widget. Upload your image from the Content tab. Then, enter the Style tab and set the Max Width to 125px under the Image option.
#️⃣ Step 4: Add Nav Menu Widget
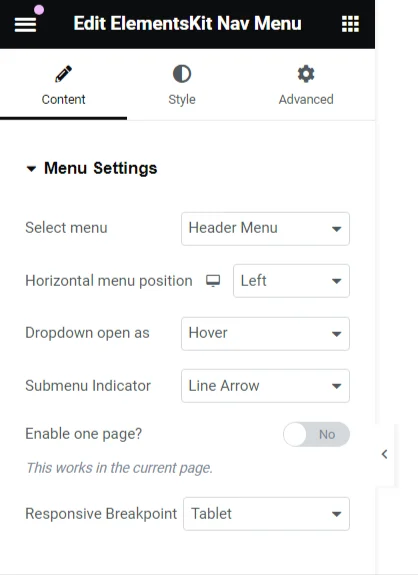
Go to the second column and add the ElmentsKit Nav Menu widget. You can easily configure the menu styles, customizations, and mobile menu settings. To do all these, you have various settings like Select Menu, Horizontal Menu Position, Dropdown Open as, Responsive Breakpoint, Mobile Menu Icon/Logo, etc.
Here’s our nav menu customization using the Style tab:
Under Menu Wrapper option,
- Menu Height: 60px
Under Menu Item Style option,
- Item Spacing: 50 (Right)
For our tutorial, we haven’t used all the customization options. You can utilize all the features of the ElmentsKit Nav Menu widget to effortlessly create interactive navigation for your website.
Now, if you’re done with adding up your website menu we’ll proceed to show y. how to add a button in the menu of the classic WordPress theme.
#️⃣ Step 5: Add Button to WordPress Menu
In order to insert a button to your menu, add the ElementsKit Button widget in the second column. Go to the Widget settings and make the following changes:
In the Content tab,
Under Content option,
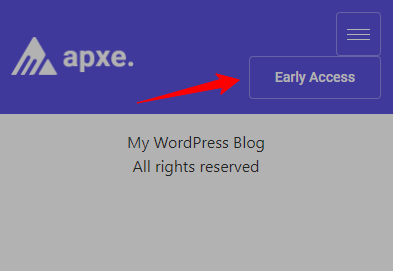
- Label: Early Access
In the Style tab,
Under Button option,
- Padding: Top/Bottom: 11, Left/ Right: 25
Click the Hover option and change the text and background color.
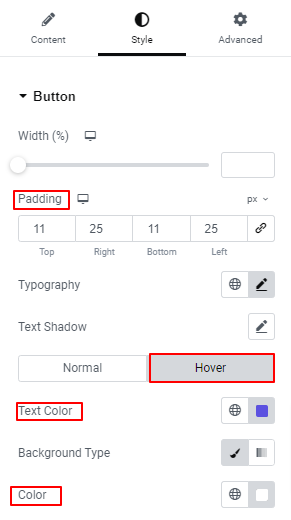
- Text Color: #5C51E0
- Background Color: #FFFFFF
Next, we’ll add a border around the button. Under the Border option:
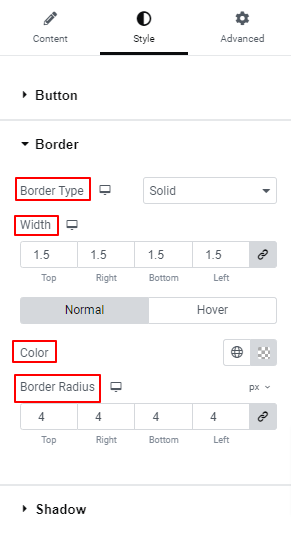
- Border Type: Solid
- Width: 1.5
- Color: #FFFFFF57 & #FFFFFF (On Hover)
- Border Radius: 4px
Hit the Update button to save your work. That’s it. Now, we have a stylish and attractive button on our website menu.
🟢 Desktop View:

🟢 Mobile View:
| 💡 Also Read: The Beginners Way to Build a WordPress Website |
Wrapping Up!
Now that you know how to add a button in the WordPress menu whether you’re a block theme or classic theme user. Having a button on your website menu is great for bringing your visitors effortlessly to your targeted pages.
And, we’ve tried to give a comprehensive outway. Following our tutorial, you will be able to make an entire header navigation menu including logo, menu, and button. Finally, the best thing is that you won’t have to face any coding issues throughout this tutorial.
Leave a Reply