WordPress is the most popular and go-to content management system for testing all types of websites.
But, you don’t necessarily need a web hosting plan for this. Localhost is most ideal as it’s free from any cost.
Now, here’s the question — does localhost affect or risk your live site? The answer is “NO”.
Learn how to use WordPress in Localhost!
Table of Contents
Why Use Localhost in WordPress?
Let’s define first what localhost is so we could better understand why you should use localhost instead of a hosting plan.
Localhost is a testing environment where you can develop and experiment with your WordPress website without affecting your live site.
Let’s take a look at the advantages you can get if you are using a localhost:
👍 Safety: You can test new features, plugins, and themes without risking your live site’s data or functionality.
👍 Speed: Localhost provides a faster development experience, as you’re not relying on network connections or server load.
👍 Privacy: Your website’s content and development process remain private until you’re ready to launch.
Tools You Need to Run WordPress on Localhost
Ofcourse, it is essential to know what are the prerequisites to install and have a running website on a localhost.
To get started, you’ll need to take note of these following tools:
👌 Local Server Environment: This software creates a local server on your computer, simulating a real-world web server. Popular options include:
- XAMPP,
- WAMP,
- MAMP, and
- LocalWP
👌 WordPress Installation: Download the latest WordPress version from the official website.
Step-by-Step Guide to Using WordPress in Localhost
Here are the steps to follow in setting up WordPress on localhost. So, make sure you don’t miss any steps:
Step 1:Choose your Local Server Environment
First, you’ll need to install a local server environment. This software package will simulate the server functions (such as Apache, MySQL, and PHP) needed to run WordPress.
Here are the local server environment you can choose from:
- XAMPP (cross-platform),
- WAMP (Windows),
- MAMP (Mac), and
- Local by Flywheel are all popular choices.
After you decide the best server, download it from its website. Make sure that you follow their installation instructions so that you will be guided accordingly.
Once installed, start the local server. For example, in XAMPP, you’ll need to start Apache and MySQL services.
In this tutorial, we’ll be using the LocalWP as our localhost. Among the local servers, LocalWP is the easiest to install and start your local website with. And what’s so good about this server is that you can create multiple local websites.
So, stay tuned and keep reading!
Step 2: Download LocalWP
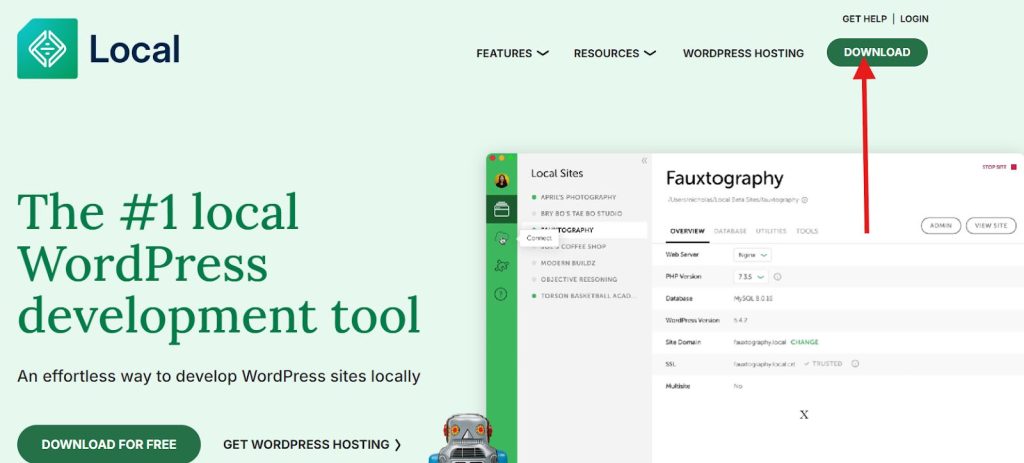
Go to Google Search Engine and search for LocalWP. Find the “Download” button and click on it.

A new tab will open where you will need to enter all the information being required.
After you provide all the necessary information, hit the “GET IT NOW” button. Once the download process is complete, open the server and you will get to choose the installation options. Then, click “Next”.
Now, click “Install” to finish the installation process. This will take a minute or two to complete.
Next, run the local by clicking the “Finish” button.
Step 3: Build a WordPress Site Using LocalWP
After the installation, it’s about time to create your local website. Open WPLocal on your device and click the plus (+) icon.
Select “Create a new site” and click “Continue”.
Give a name to your site and click continue.
After that, set your environment by selecting “Preferred” and click continue.
Next, set up your WordPress by adding your WordPress name, password, and e-mail. Then, click “Add Site”.
You will then be taken to the WPLocal dashboard where your site will appear.
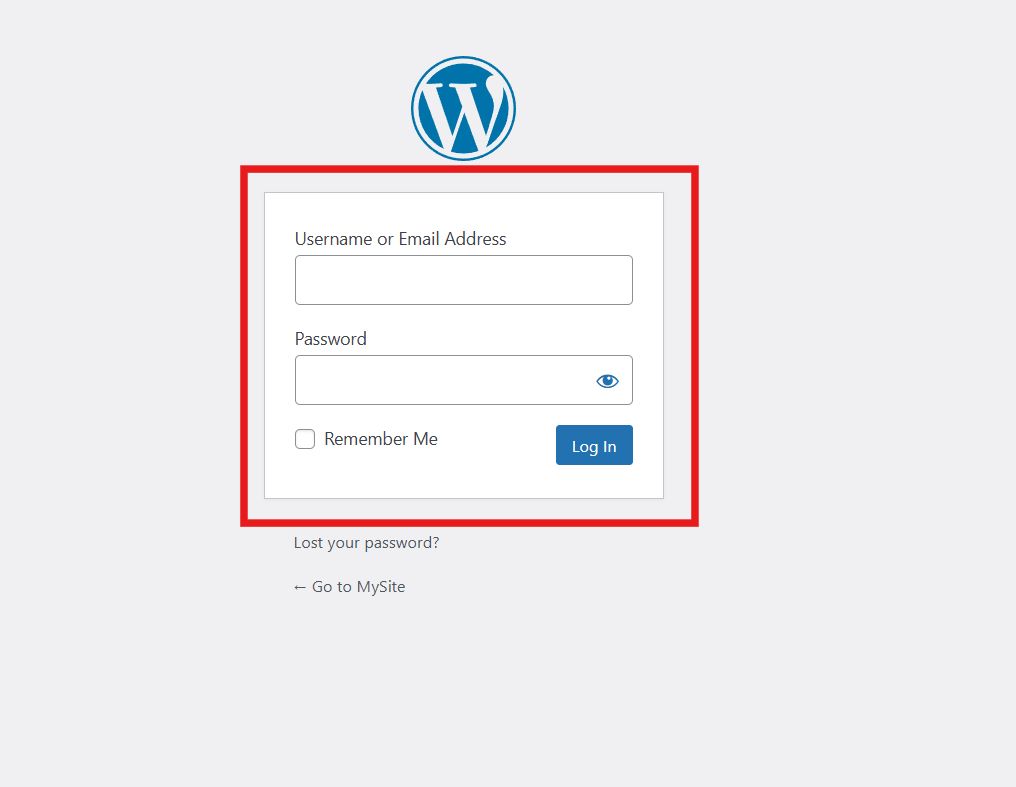
Click on the WP Admin and you will be taken to your WordPress login portal.

Bonus: Plugins You Should Consider
Although you’ve finished setting up your local WordPress site, that’s not the end yet. To design and improve the total appearance of your site, you will need the help of plugins.
Here are some recommendations:
🚀 ElementsKit – All-in-one Elementor page builder to create a stunning website.
🚀 GutenKit – If you wish to use Gutenberg editor, this tool is the perfect solution.
🚀 ShopEngine – This tool is designed for WooCommerce online stores.
🚀 GetGenie AI – An Ai writing assistant to help you create SEO-optimized blogs.
🚀 EmailKit – A conversion-friendly email customizer for WooCommerce and WordPress.
🚀 MetForm – Elementor plugin to create any type of forms — contact form, signup form etc.
🚀 WP Social – A plugin to integrate social media into your WordPress.
🚀 WP Ultimate Review – Easiest solution to gather social proof to build your brand integrity.
🚀 FundEngine – A plugin to incorporate fundraising campaigns in your website.
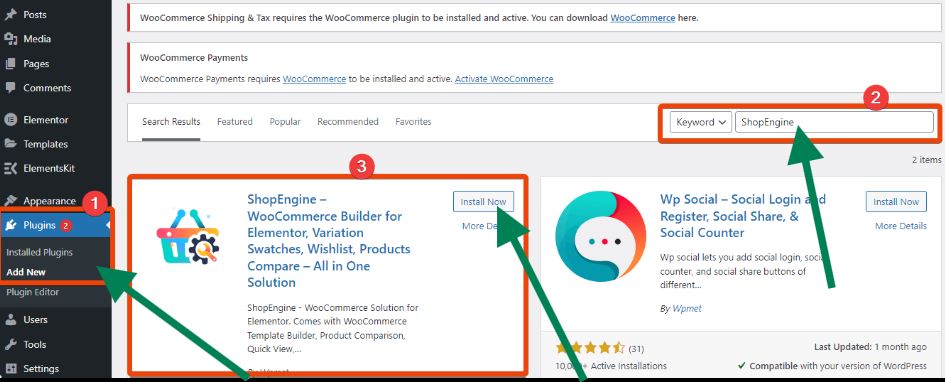
And to install these plugins, simply go to your WordPress website and look for “Plugins” in your dashboard. Then, select “Add New”. In the search bar, enter the name of the plugin and click “Install Now”.

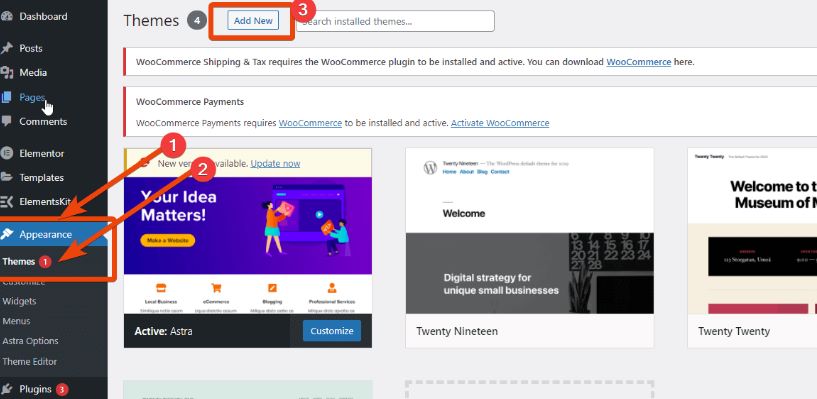
Another option to install a WordPress theme plugin is to navigate to your WordPress “Appearance” in your dashboard. Select “Themes” and click “Add New”. Then, search for the theme and install it.

FAQs
What is the difference between localhost and a live server?
Can I access my localhost WordPress site from another computer?
Is it safe to develop a site on localhost before going live?
Conclusion
Running WordPress on localhost is the most ideal and easiest way to build, test, and refine your site before making it live. Localhost ensures that your work remains private and error-free.
Follow this simple guide, you’ll have a fully functional local WordPress environment where you can freely experiment.
So, try adding plugins to your local website and experiment until you discover the looks of the website for your brand.
Happy building!
Leave a Reply